
Hi! Welcome to NON-STOP TEACHING!
This is a tutorial on how to make tarpapel using the Microsoft Word. Before we start, I would like to inform you that this only works on EPSON Printers. We haven't tried it yet in other printers so if your printer's manufacturer is not EPSON, we recommend you to use Microsoft Excel and read the tutorial on How to Make Tarpapel in Microsoft Excel.
Okay, let's start!
This is the easy step-by-step tutorial on how to make tarpapel in microsoft word (with screenshots).
NOTE: Click the image to enlarge.
Step 1: Run the Microsoft Word and input the data

You can run it by pressing the start/windows button and search for the program "Word" or you may also click the shortcut icon located at the desktop screen. After that, input your data that you want to print. You can insert texts, images, charts, etc. and you can also customize the page layout.
Step 2: Go to Print-Page and Click Printer Properties

Press CTRL + P or you can also click File/Print. Don't print it yet and proceed to Step 3.
Step 3: Look for the "Multi-Page" option

It's off by default right?
Step 4: Choose your desired pages

It's time now to choose how many pages you want to use. There are 6 options: 2-UP, 4-UP, 2x1, 2x2, 2x3, 2x4. You may refer to the preview located on the left side of the window.
Step 5: Click okay
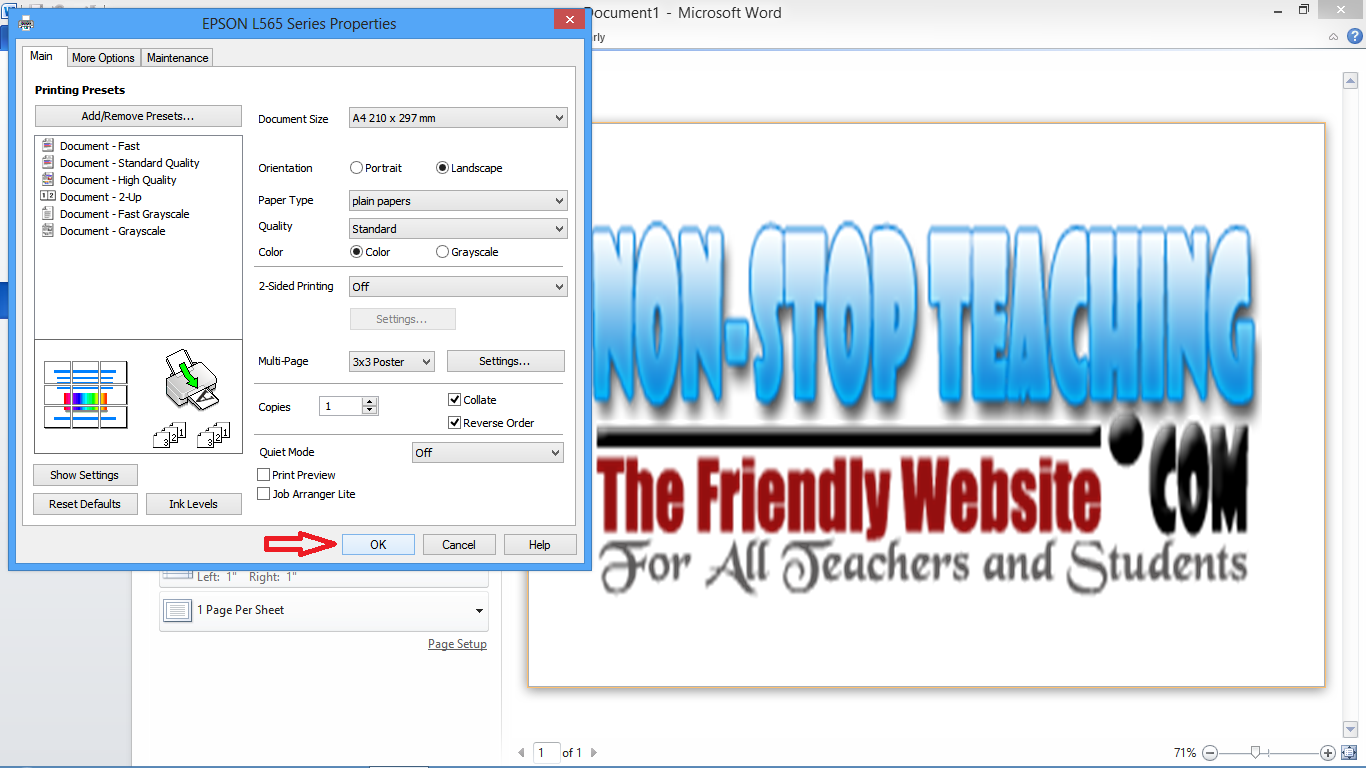
After choosing your desired pages, you may now click the "OK" button to proceed.
Step 6: Click Print

There you go! You can now print your document. Congratulations! :)
I hope this tutorial helps you.
Questions? Just leave a comment below.
Happy to help :)


Thank you for the info its a big help for me.
ReplyDelete